Teamogy Chat
Chat in Teamogy is a really useful tool for communication of the entire team in the system. You can use a One to One message between two users or create Rooms between two and more users. You can use chat to write a message, send an attachment, picture or create a video conference in meet.teamogy.com etc. Don’t forget to set up your change sound notification and chat sound volume in the User area. Choose the sound you like!
If you would like to open the Chat, just click on the chat icon in the navigation bar at the top of your screen and you will see the whole Chat modal.
One to One message
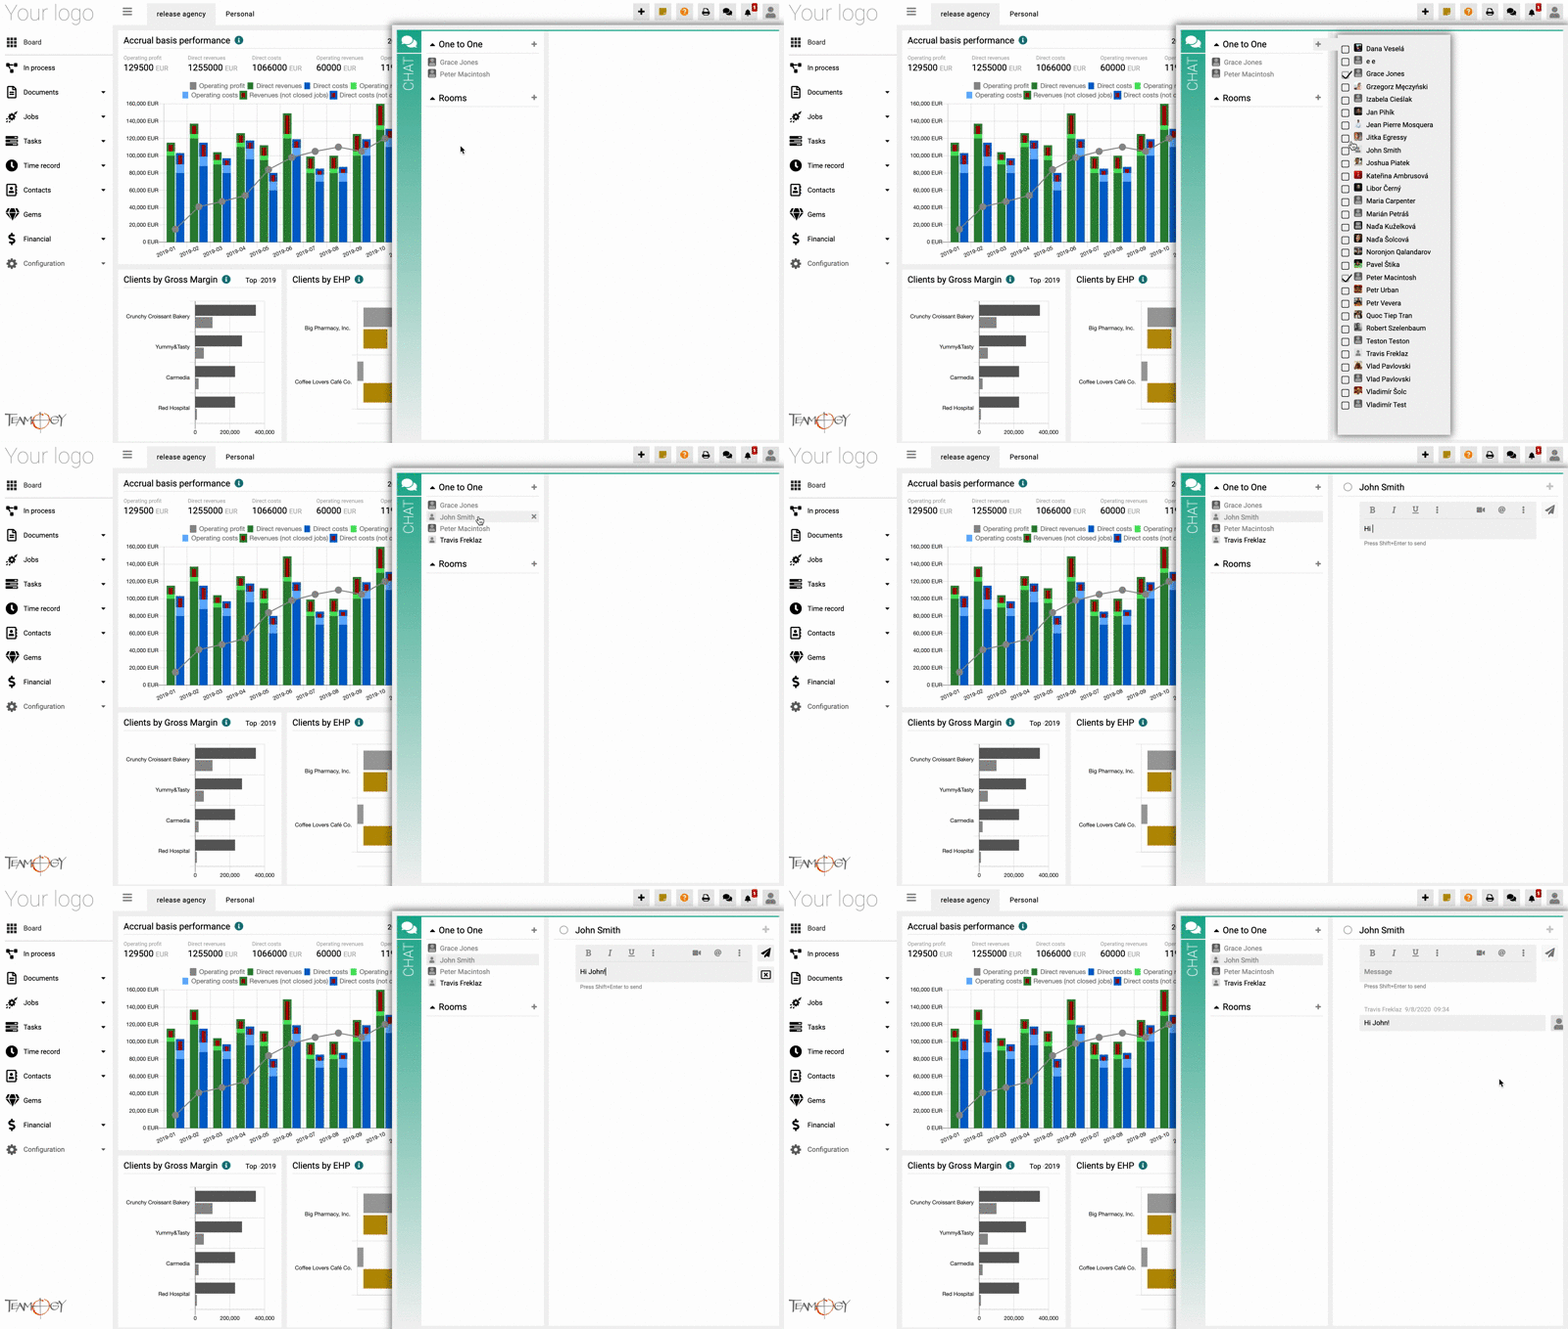
One to one message is a conversation between two users. You cannot add a third person to the conversation. Third person cannot load a conversation which he is not a member. The communication is fully protected.
Click on the Add icon and choose the person you want to communicate with and the chat will be created. Check the GIF below how to create One to One message.
Rooms
Rooms allows you to add more users into one conversation. You can create a Private room or a Public room that are different by settings. The icon if Private room and Public room is different.
If the last user has left the room, it will be no longer visible in the list of Rooms.
Public room
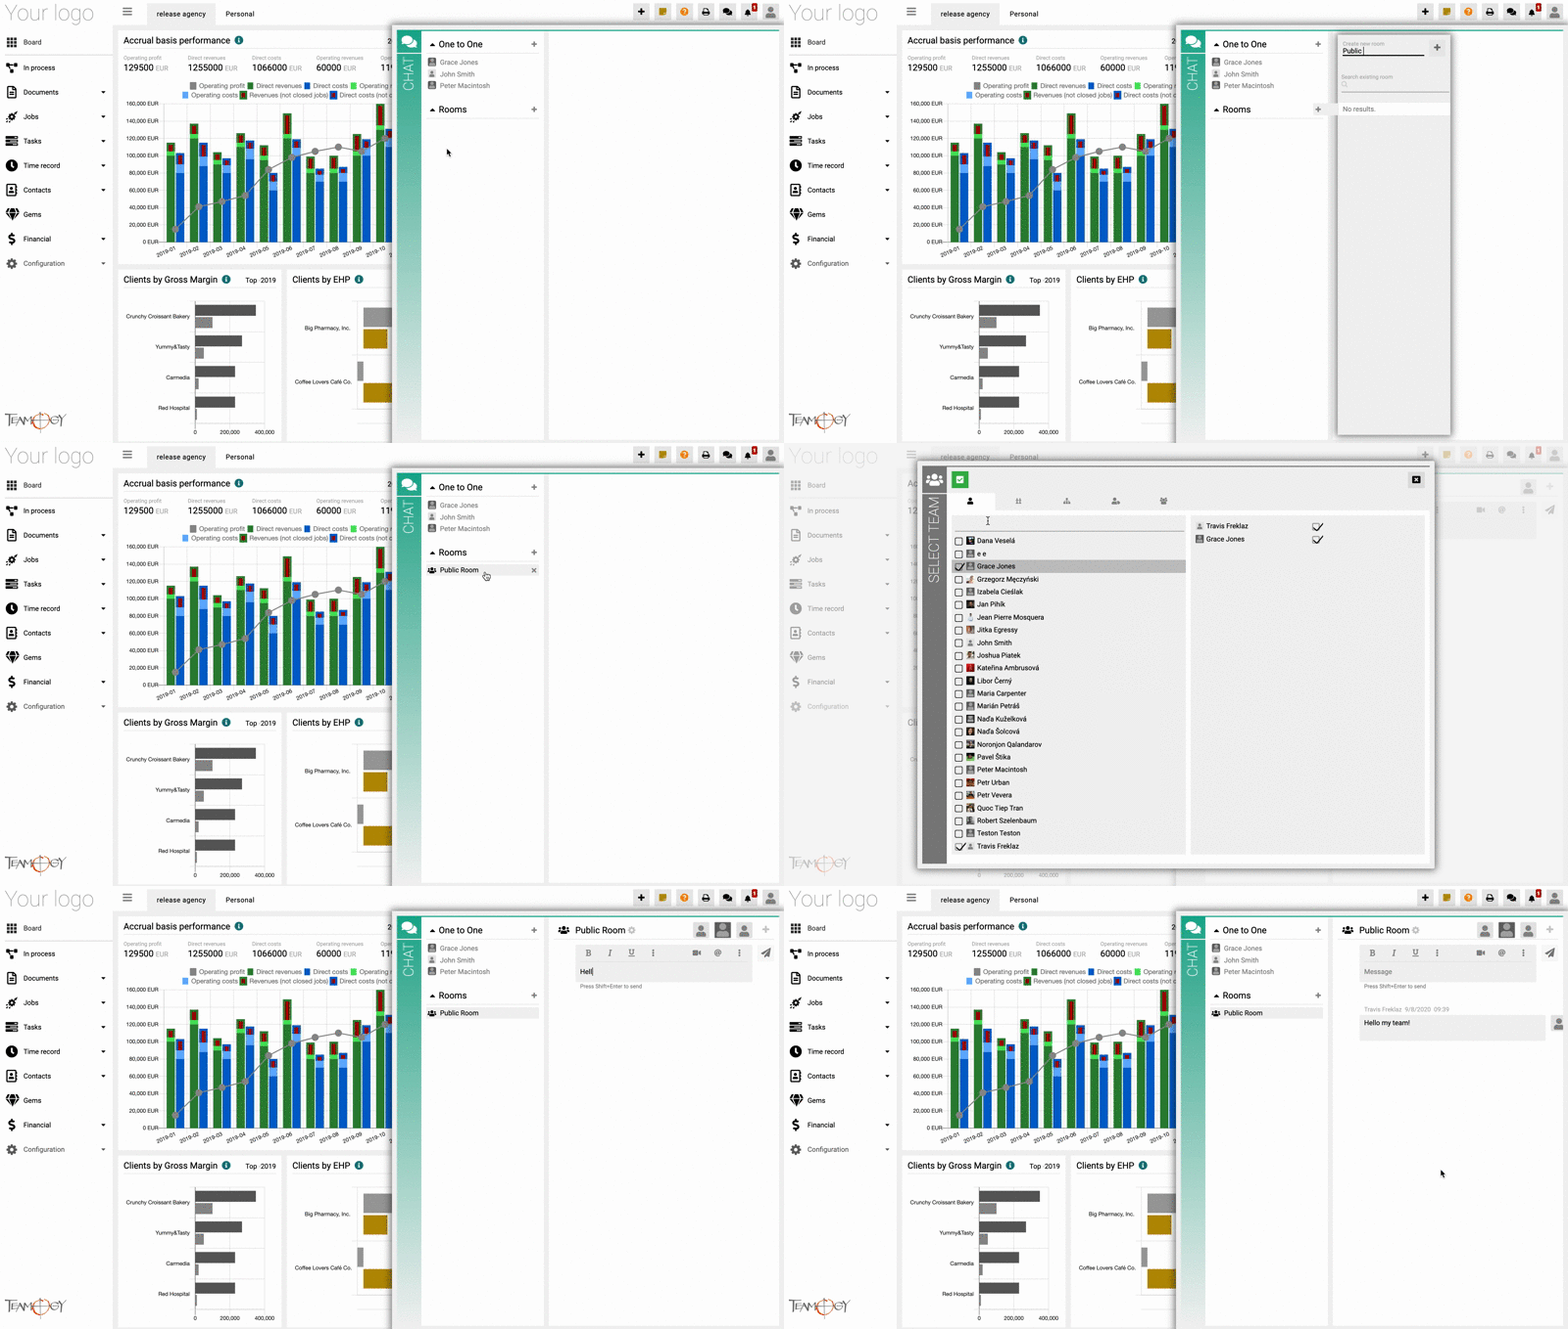
In Public room the Owner has the main rights to modify the Room. The option to invite and add anyone else is allowed to everyone.
| Owner | Everyone |
| has the right to rename the Room | can read and write |
| has the right to change the Room to private | see the existence of this room |
| has the right to close the Room | can add themselves to the Room |
| can invite / add anyone else |
Click on the Add icon next to Room, name your Public Room and that’s all, Public Room has been created. Don’t forget to add your colleagues into the Room. Check the GIF below how to create the Public Room.
Private room
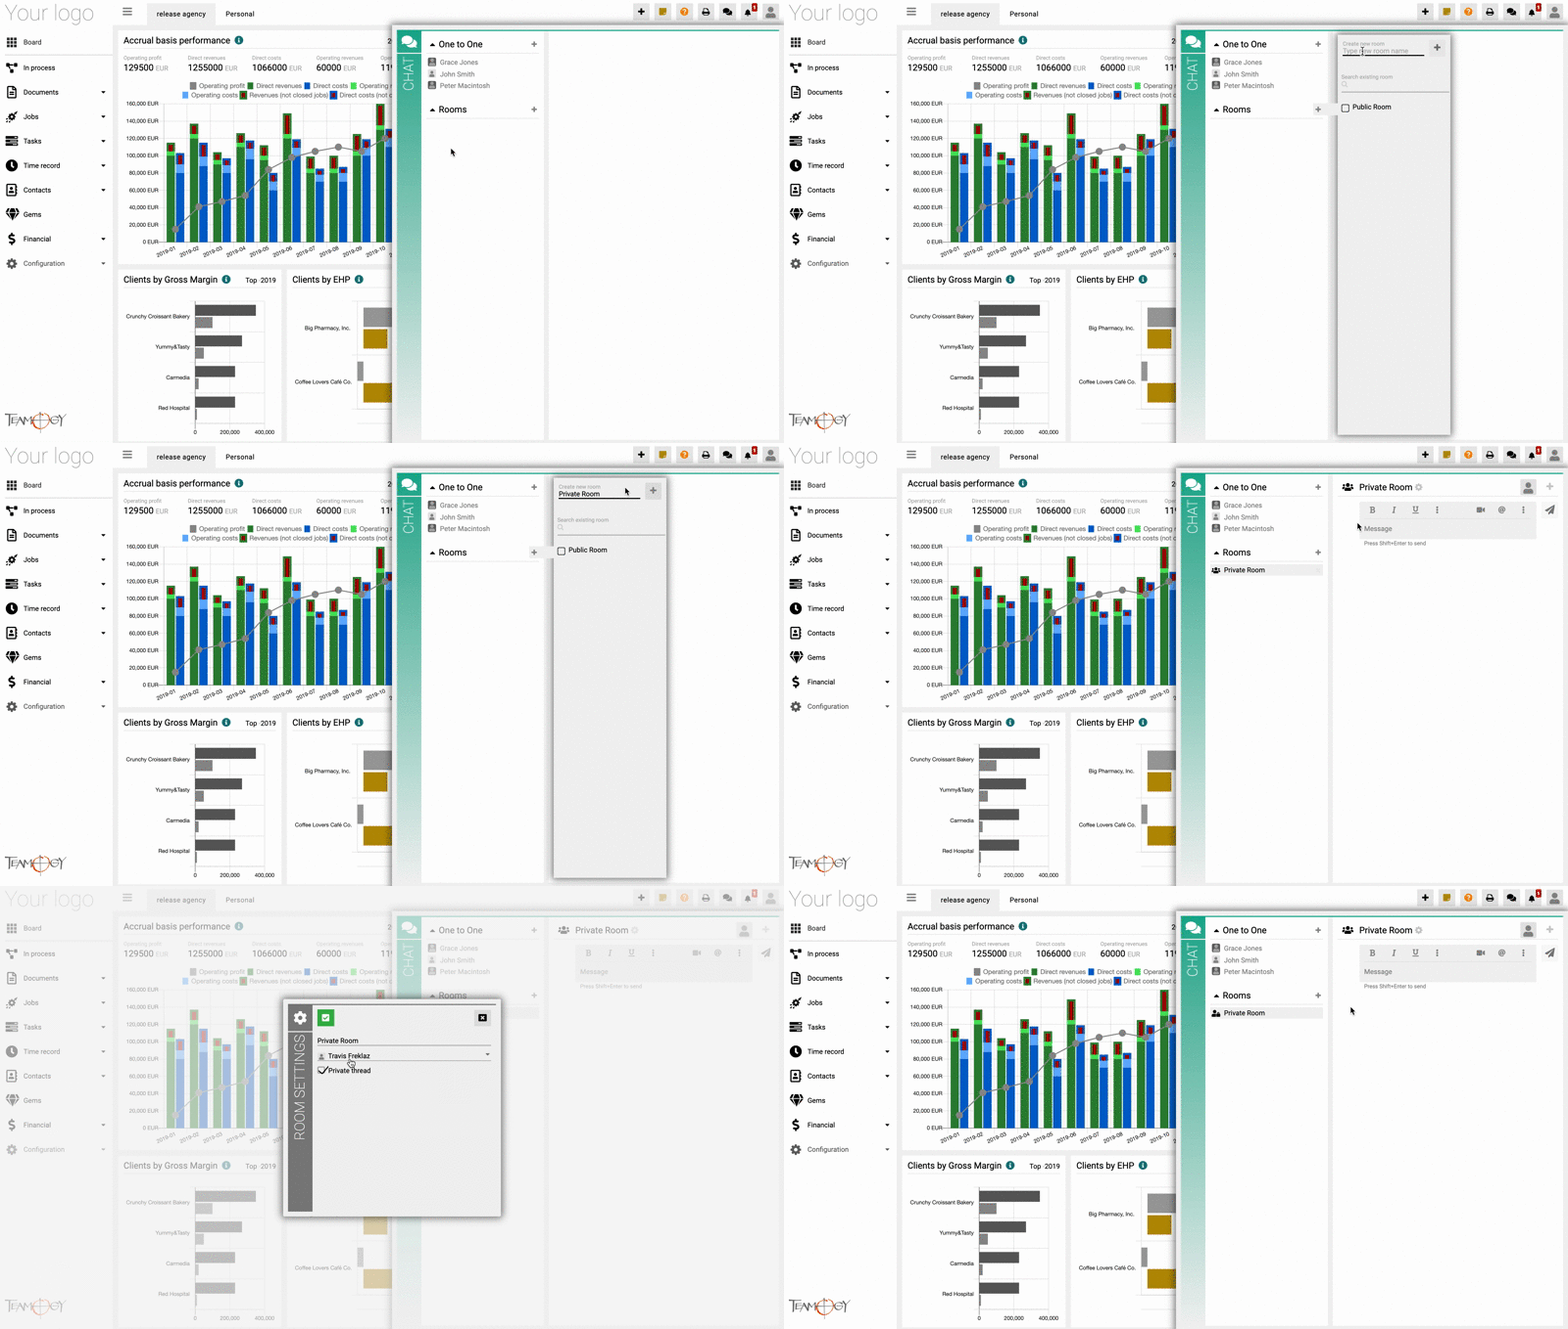
In Private room the Owner has the main rights to modify the Room and to add/invite other people into the Room. Invited people can only read, write and see the existence of the Room.
| Owner | Invited people |
| has the right to rename the Room | can read and write |
| has the right to change the Room to public | see the existence of the room |
| has the right to close the Room | |
| can invite / add anyone else |
Click on the Add icon next to Rooms, name your Room and again click on the Add icon. Then click on the settings of the Room, choose Private thread, press OK and Private Room will be created. Don’t forget to add your colleagues into the Room. Check the GIF below how to create Private Room.
Advanced features of Teamogy Chat
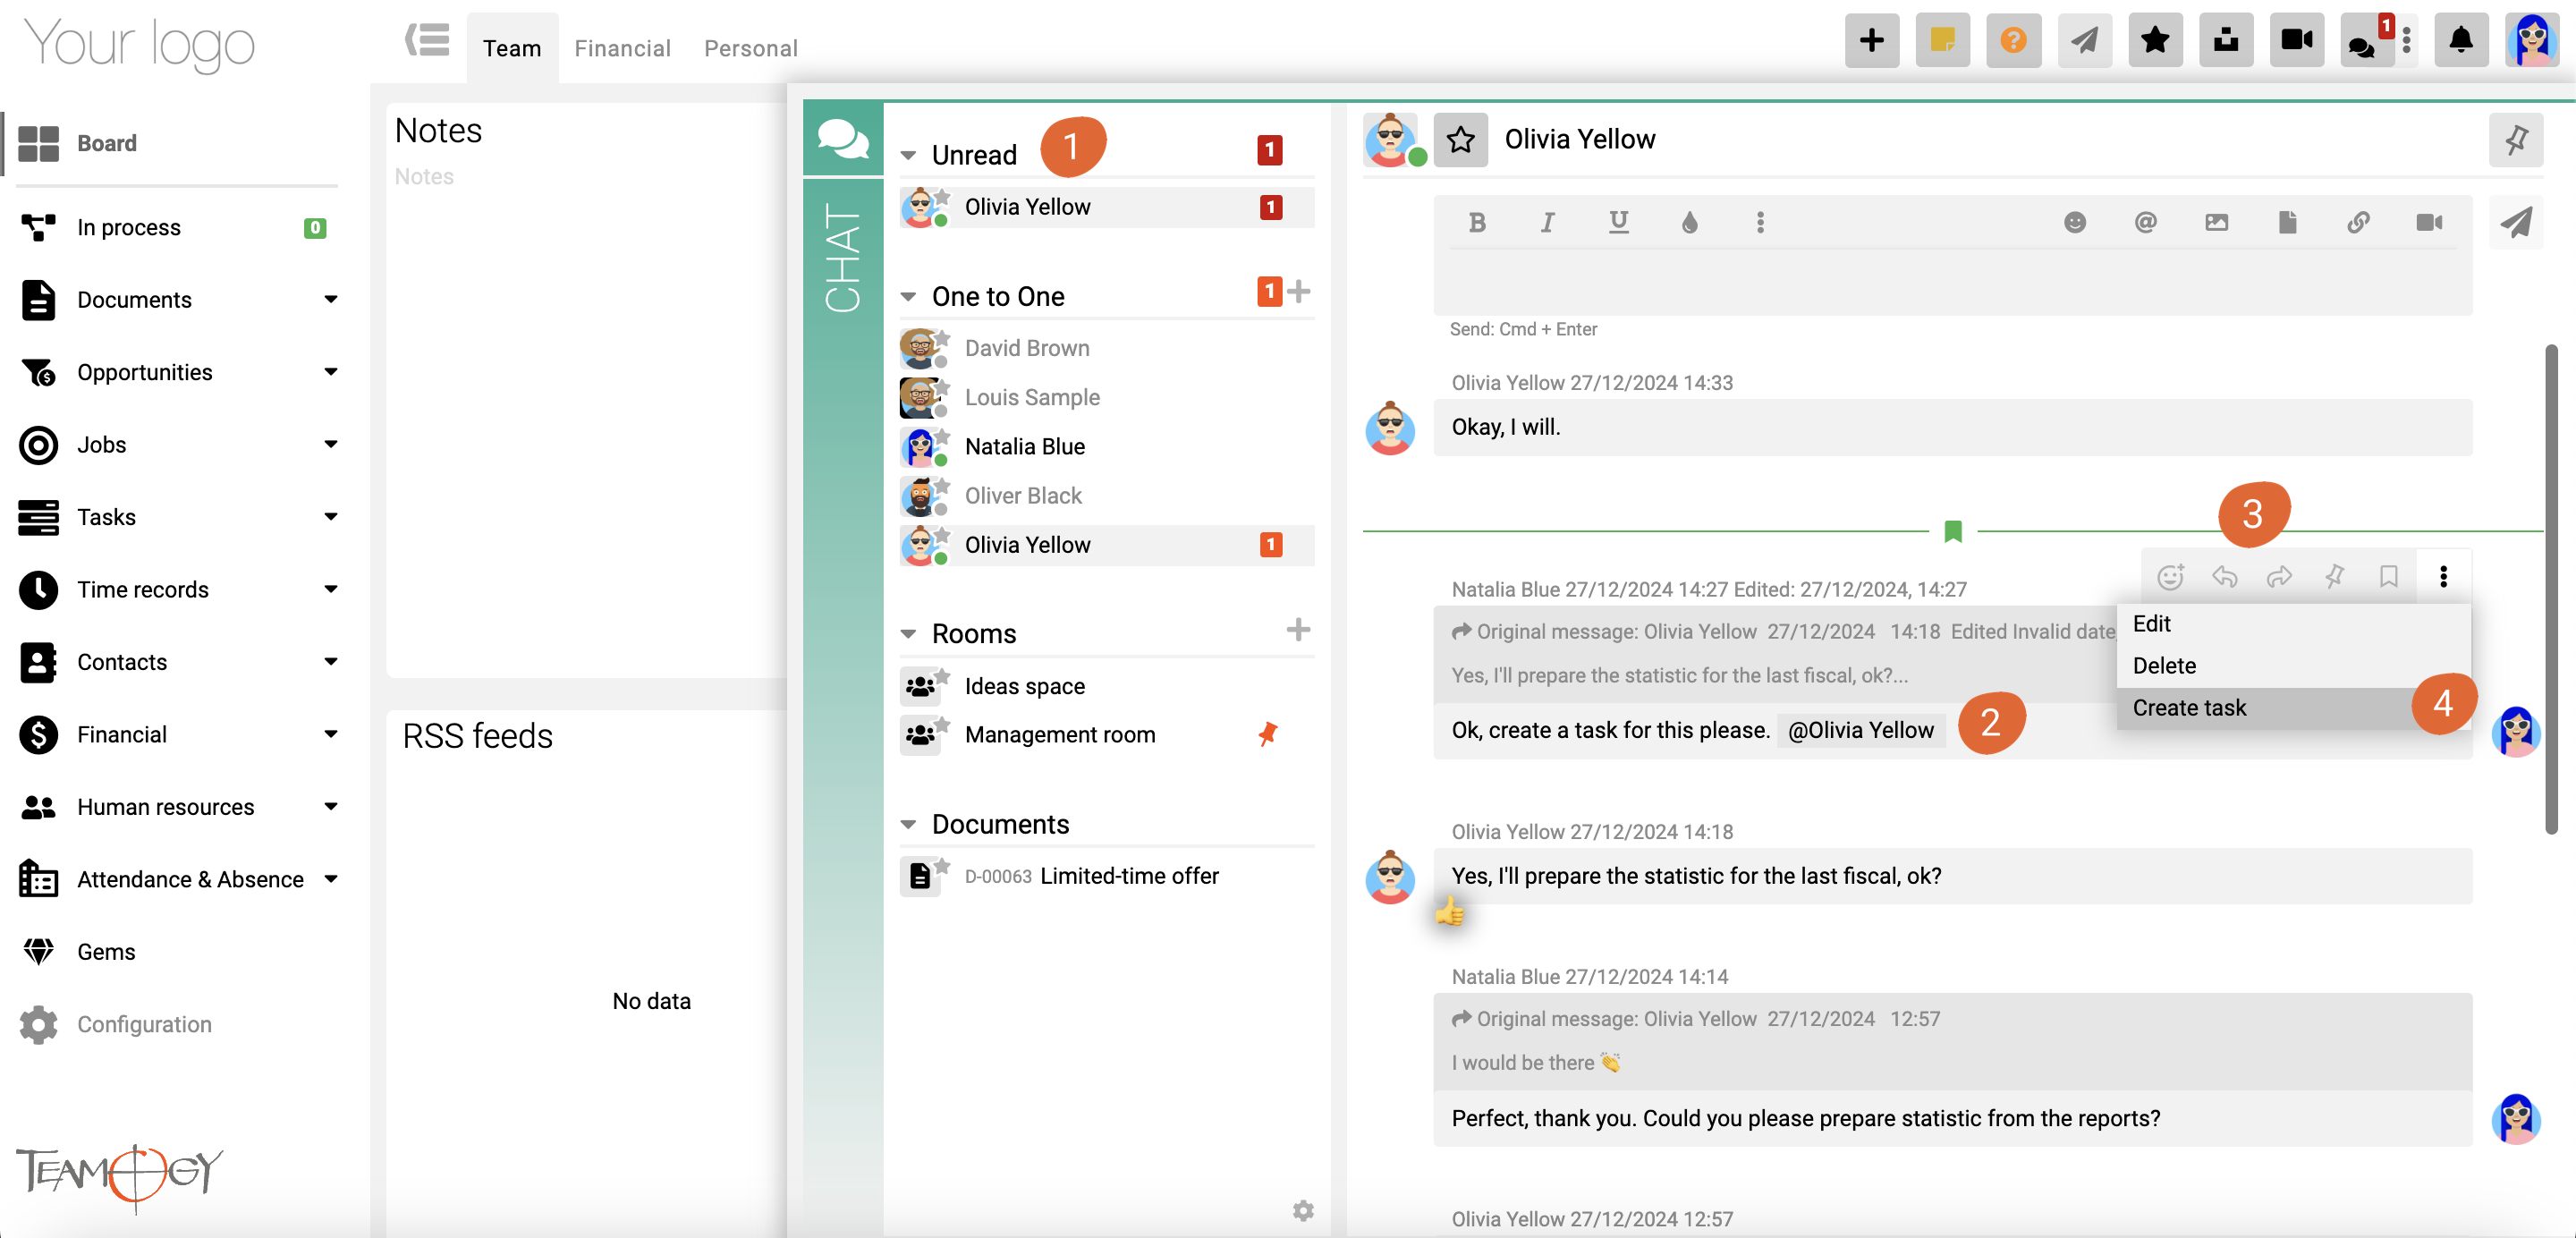
- “Unread” folder (1) – shows all monitored threads with unread posts (option to disable folder display in user settings).
- Mentioning a user (2) in a discussion – if a user is mentioned (@username), that entity’s discussion is automatically added to their monitored discussions. The discussion link is then displayed in the right-hand chat bar and the post is marked as unread. Thus, even if the user misses the notification, he or she will not lose the opportunity to respond.
- Reacting to posts with emoticons (3) – the possibility to react to a post with emoticons (regular reactions + numbers/letters for voting). Reactions are counted, the user can add or cancel the reaction. The user’s own reaction is highlighted.
- Reply to a post (3) – the ability to reply to another user’s post. Replies are displayed as a new “reply” post, including a link to the original post.
- Forward a post (3) – a post can be forwarded to another user. The forwarded post will appear as a new post type in the One-to-One thread.
- Pin a post (3) – the user can pin important posts that they want to come back to later. Pinned posts are marked in the left bar and can be filtered using the pin button in the actionbar.
- Create a task from a post (4) – the ability to quickly create a task directly from any post.
Get in Touch
If you have problem or need further assistance, do not hesitate contact Teamogy Support. Use online chat (inside Teamogy or everywhere on www.Teamogy.com in the lower right corner) and you will get prompt reply.


