How To Work With Items In Job
It is very important to know how to work with items in the Job. Items represent external costs or your company’s work for the client. One of the the biggest benefit of items in the Job is that you can track the status of each item individually. You can check whether the external costs were billed or if all the working hours for the client were invoiced correctly.
Note: Job items are switched off in default, if you would like to activate it – contact your local partner or support.
Let’s take a look on two different ways how to create new items in the Job and how to pair any order, invoice or other document into the right item.
First method – Create items from the Sales quotation
Once you create a Job, create a new Sales quotation straight from the Job.
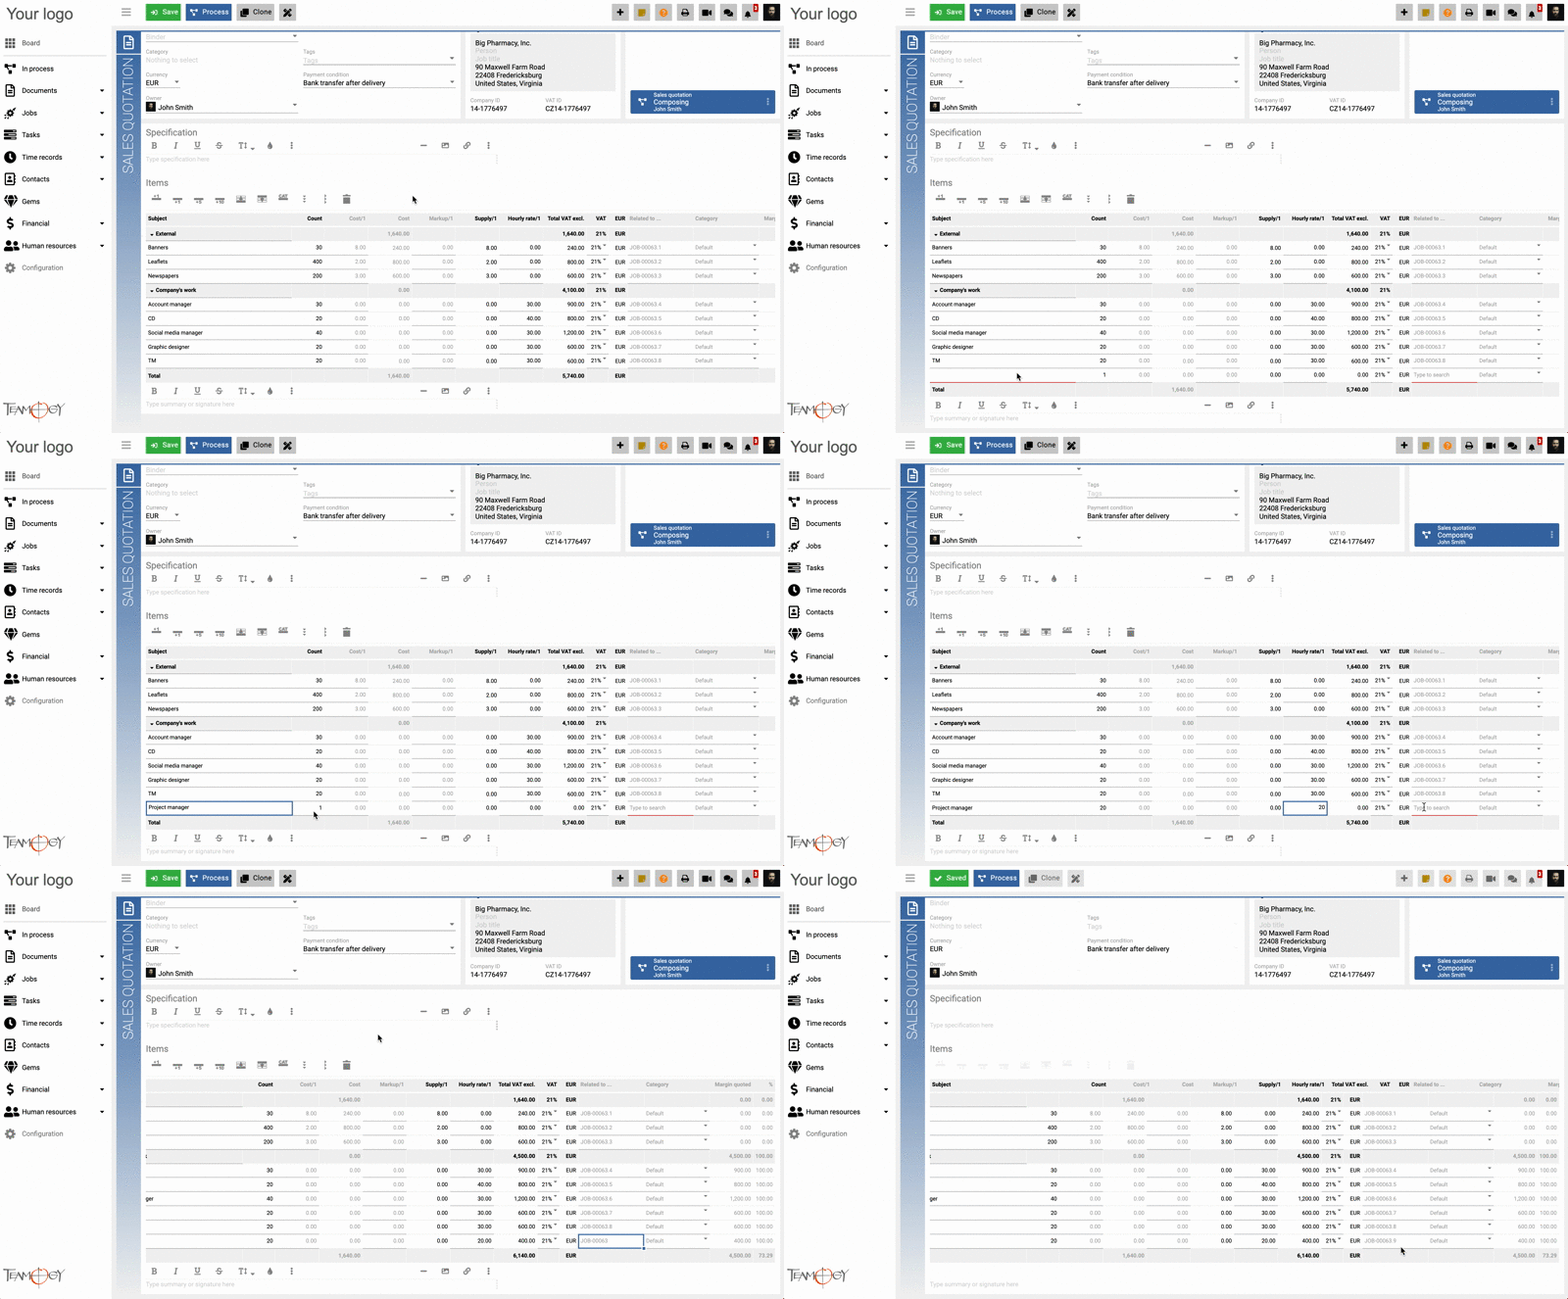
In the Sales quotation go to the items table and fill in the information about the items. In the column – Related to… , do not forget to copy the Job number into other items. This functionality is similar to the excel sheets.
Before the Save, in the column – Related to… – you will see only the number of the Job, items are not created yet. You can see that every items have the same number – JOB-00063.
After the Save, you will see that each item in the table got a specific number, that represents each item. As you can see, every items got a different number. Banners have number – JOB-00063.1, Leaflets – JOB-00063.2, Newspapers – JOB-00063.3 and so on.
Note: Items in the Job could be created after the Approval process
In the Job, you can see all created items. Then, you can easily work with items, so you can create orders, invoices and so on.
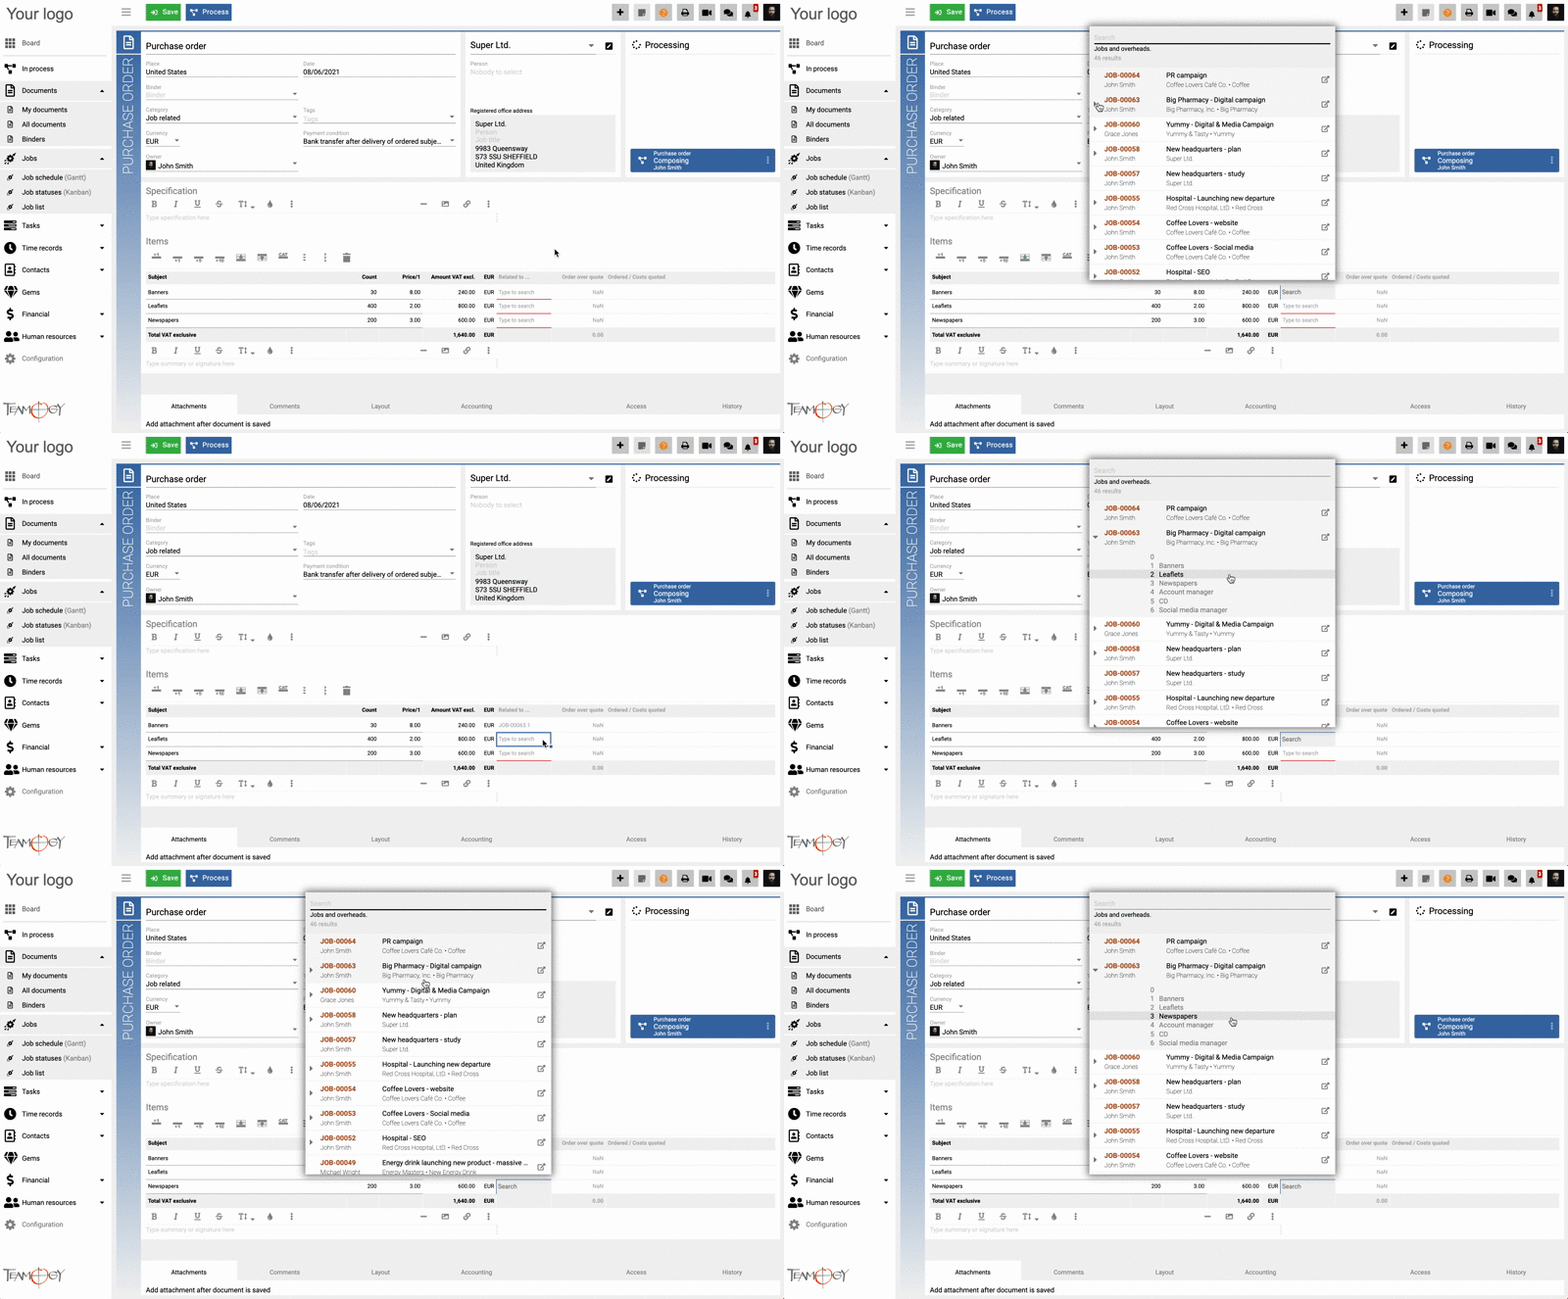
Let’s take a look how you can easily create a new Purchase order and pair it to item.
Once you fill in all the information about the subjects in the order, in the column Related to … – you can easily choose a specific Job item, to which order will be paired to. Check the GIF below.
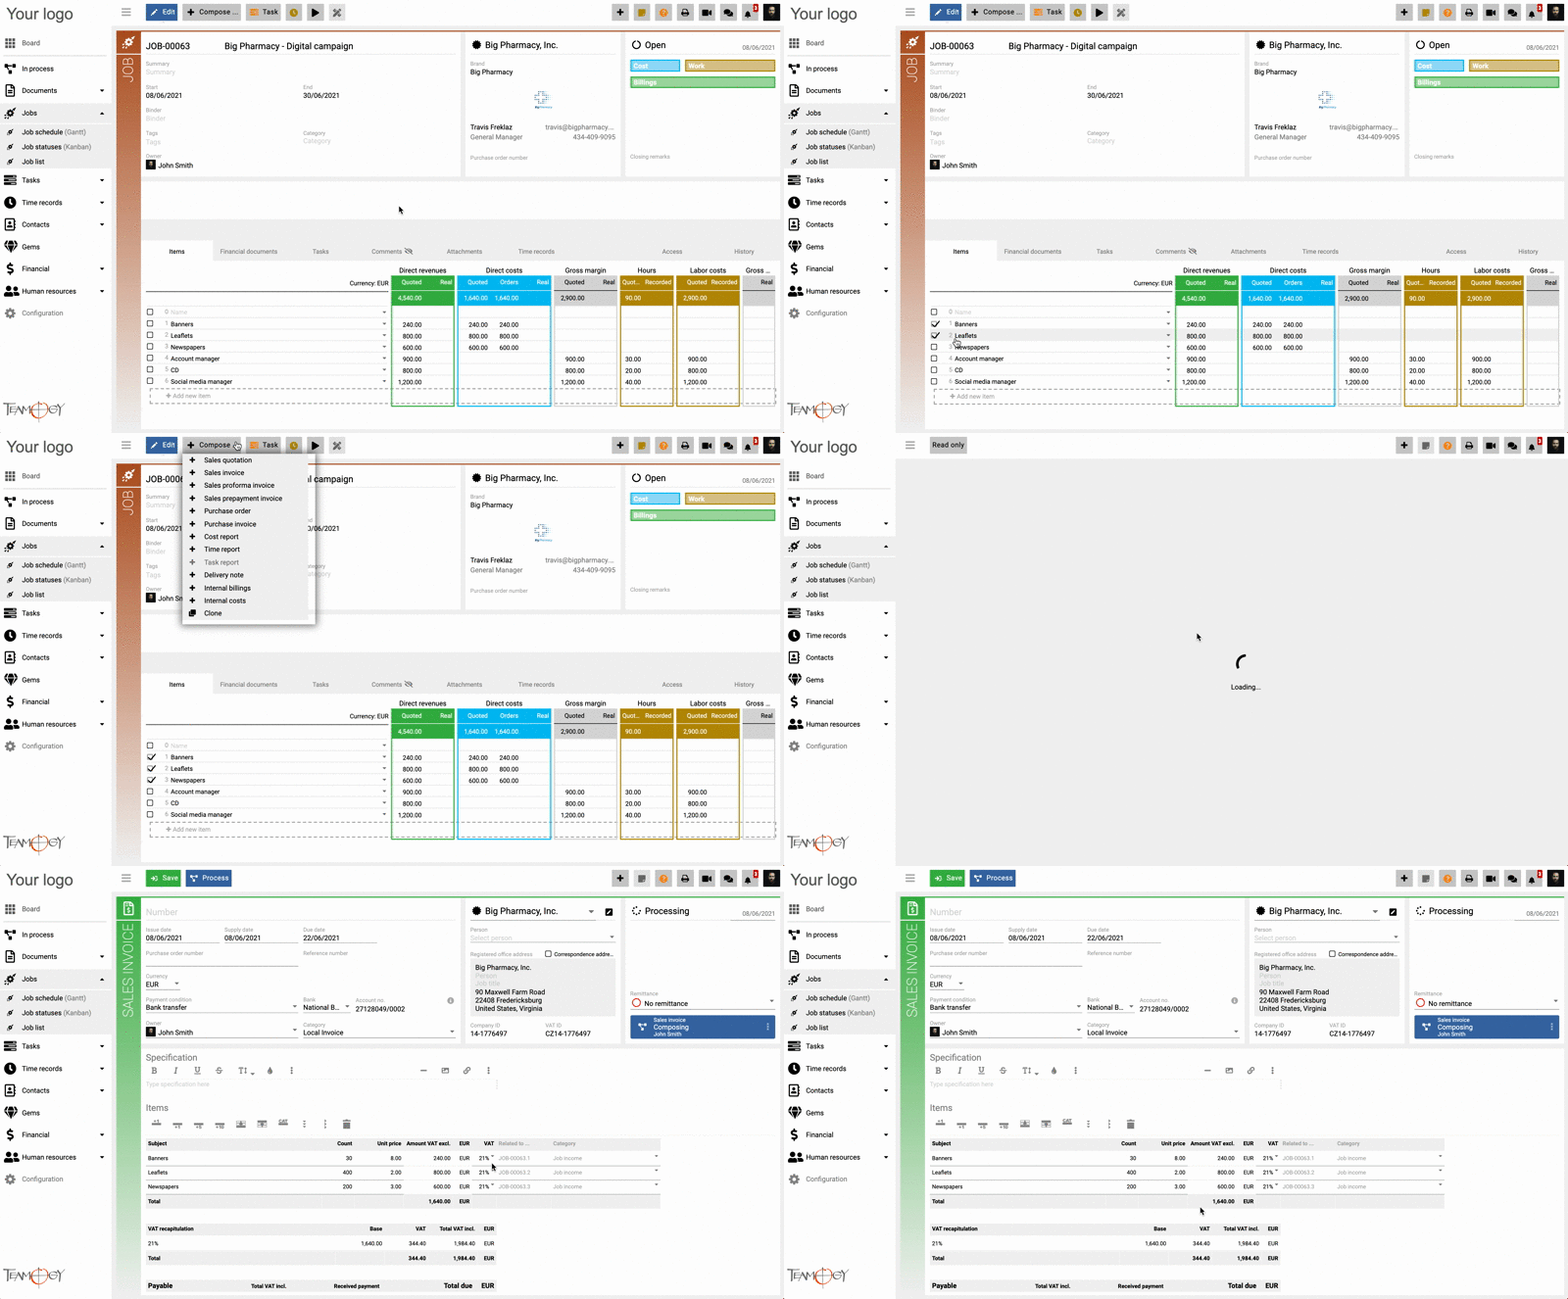
You can also choose items and create an order, invoice or other document straight from the Job. Once you choose the items from the Job table, the data will automatically copy into the new created order, invoice etc. Check the GIF below.
Important information about working with Sales quotation
1. The changes in Sales quotation will affect only the values of the job items, the name of item will not be changed. If you want to change the name of the item, you have to change it straight from the Job in the table.
2. If you want add new items from the Sales quotation, add a new row in the table, fill in the information and in the column Related to … choose only the name of the Job and after the save, the system will automatically create a new Job item. Check the GIF below.
Second method – Create items straight from the Job table
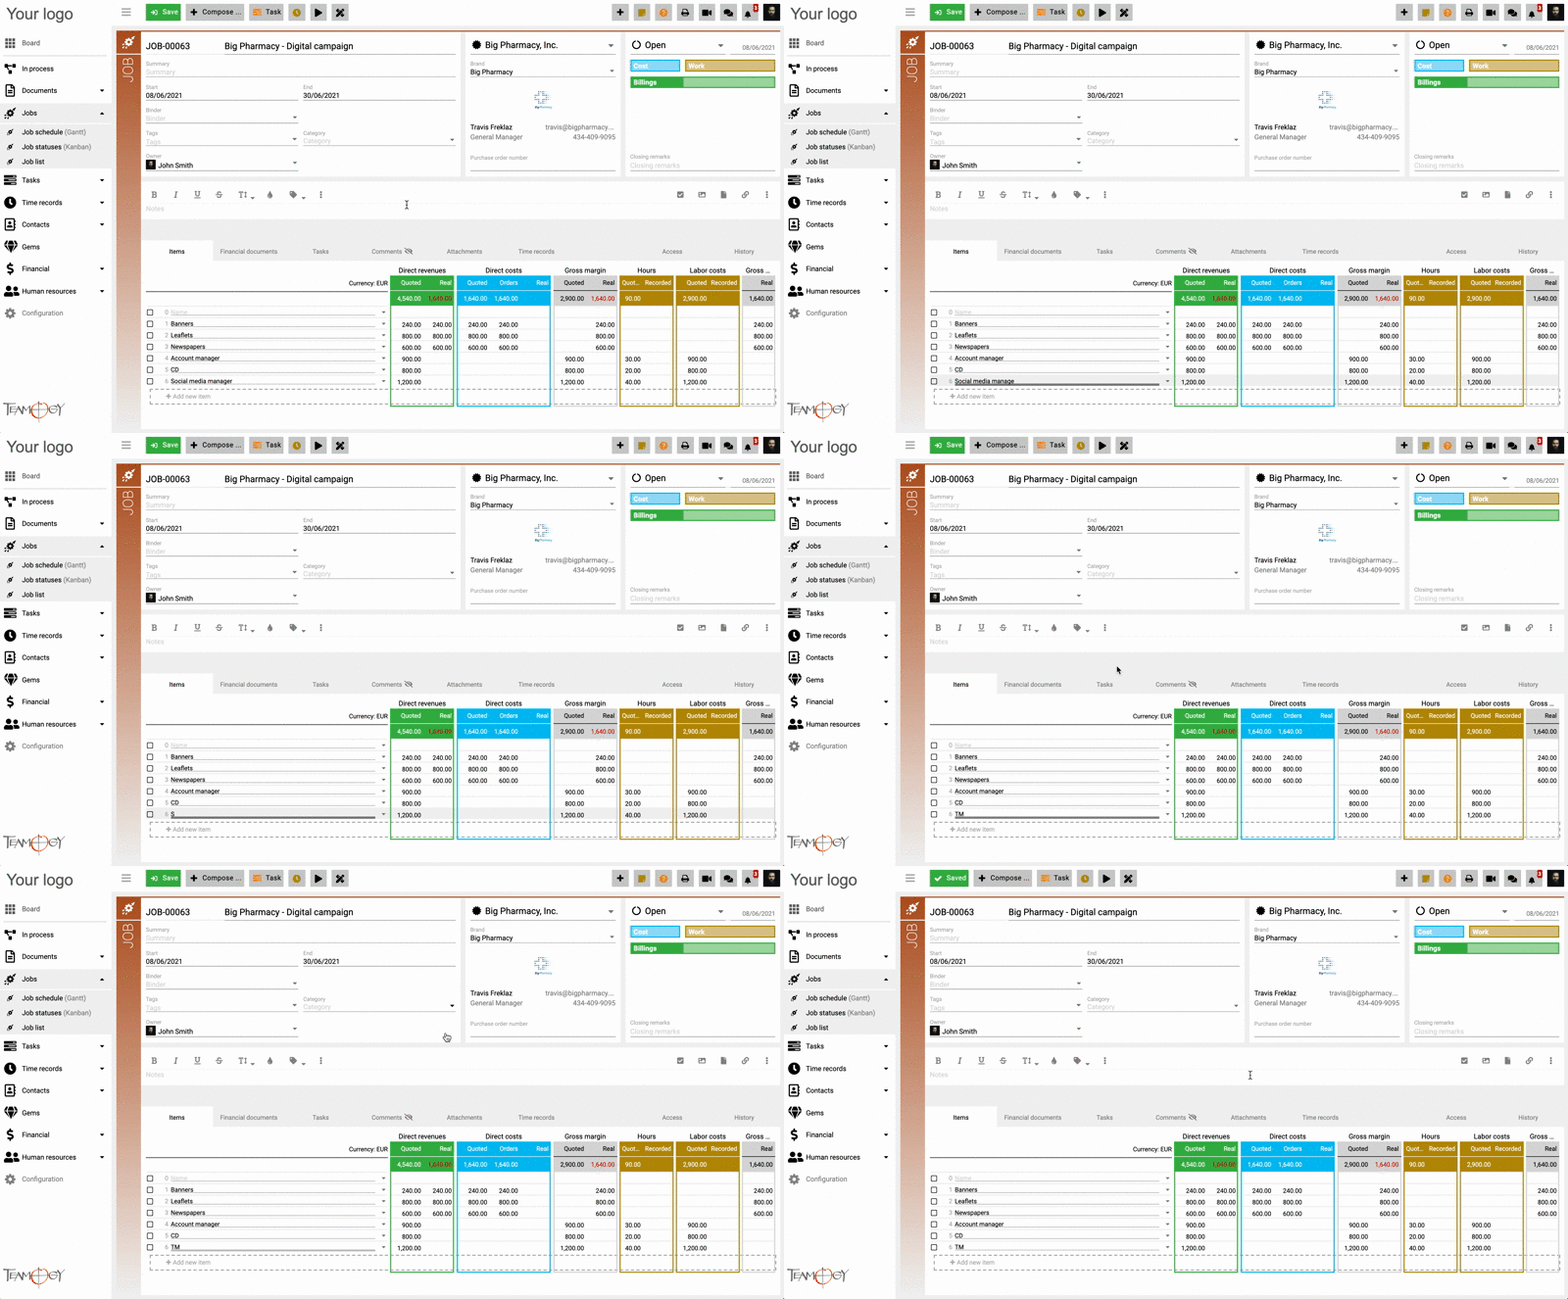
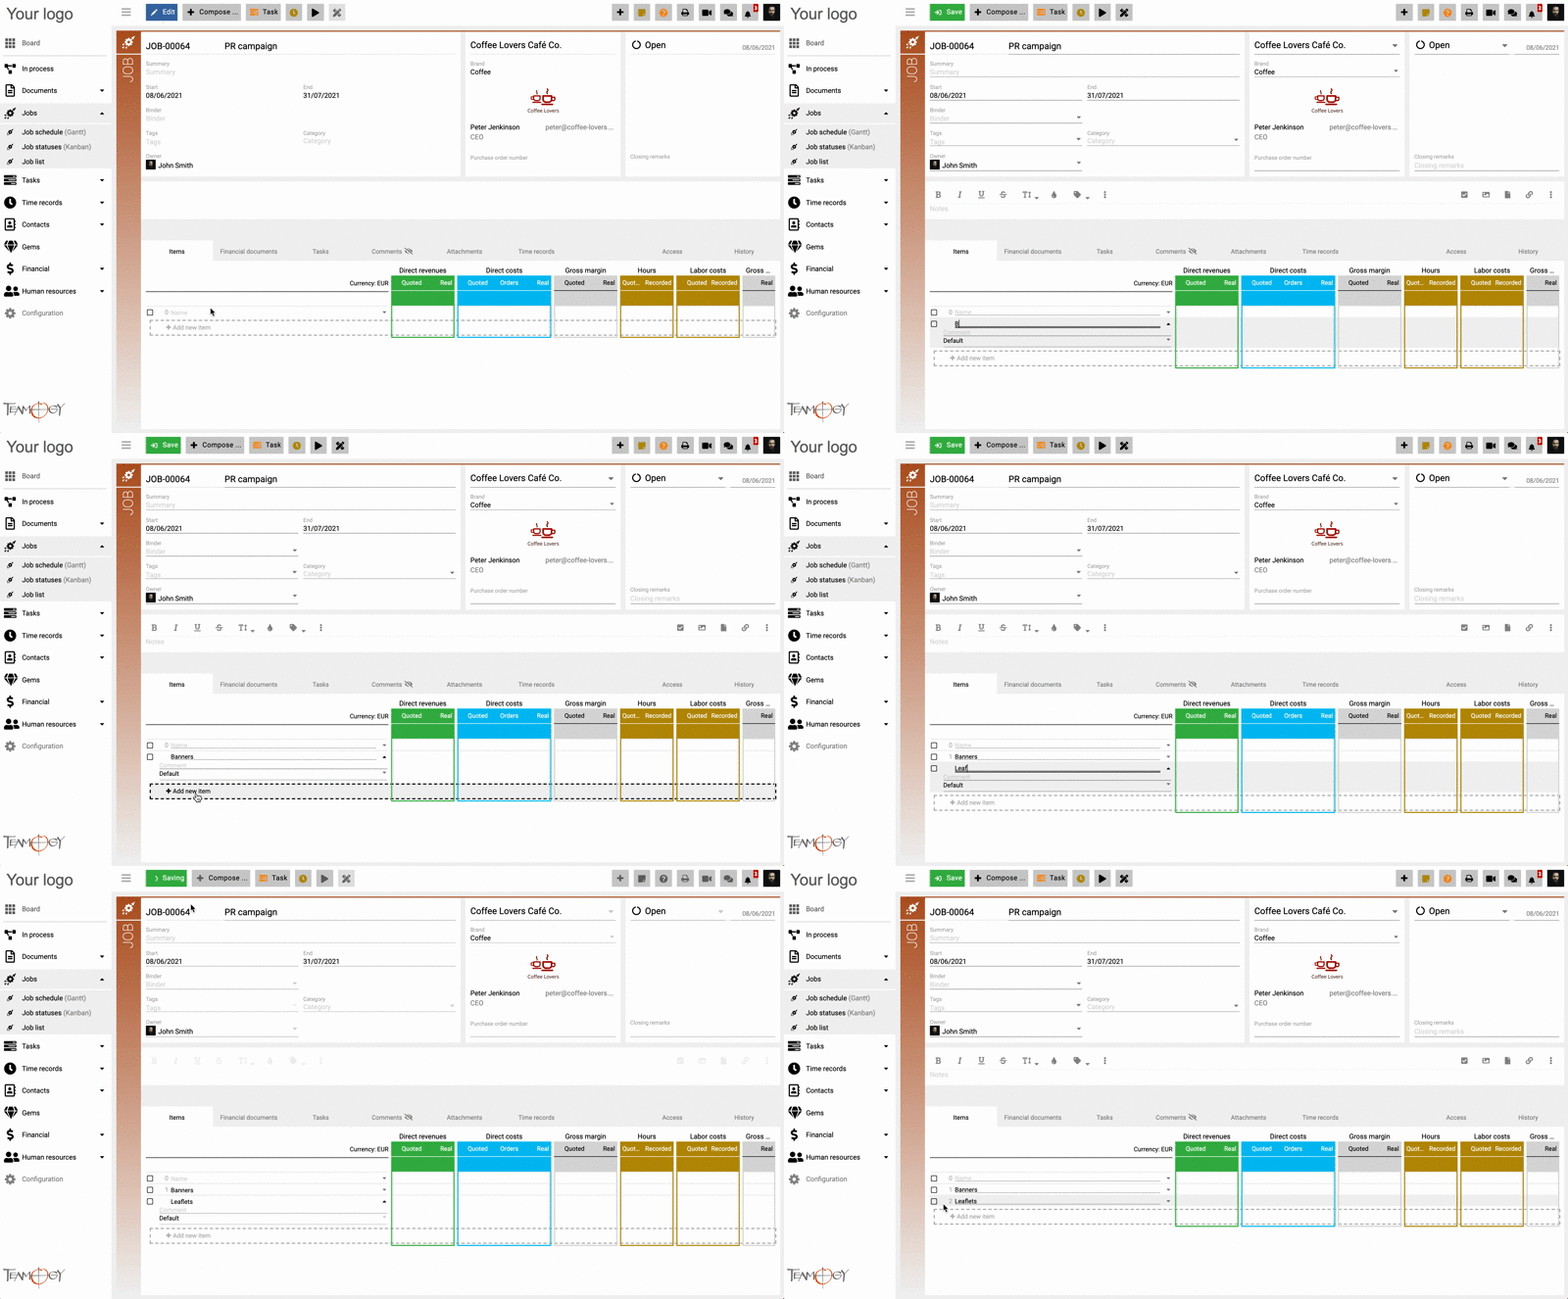
Once you create a Job, go to the Job table and click on the – Add new item. In the field – name – fill in the name of the item.
Note: Leave the row ZERO unfilled.
Create as many items as you would like to and press Save button. After that, you will see the items in the Job and create documents into it. Check the GIF below.
Get in Touch
If you have problem or need further assistance, do not hesitate contact Teamogy Support. Use online chat (inside Teamogy or everywhere on www.Teamogy.com in the lower right corner) and you will get prompt reply.


