Capacity Plan – How It Works
Firstly, start our manual by creating a new task. Here is a link on how to create new task.
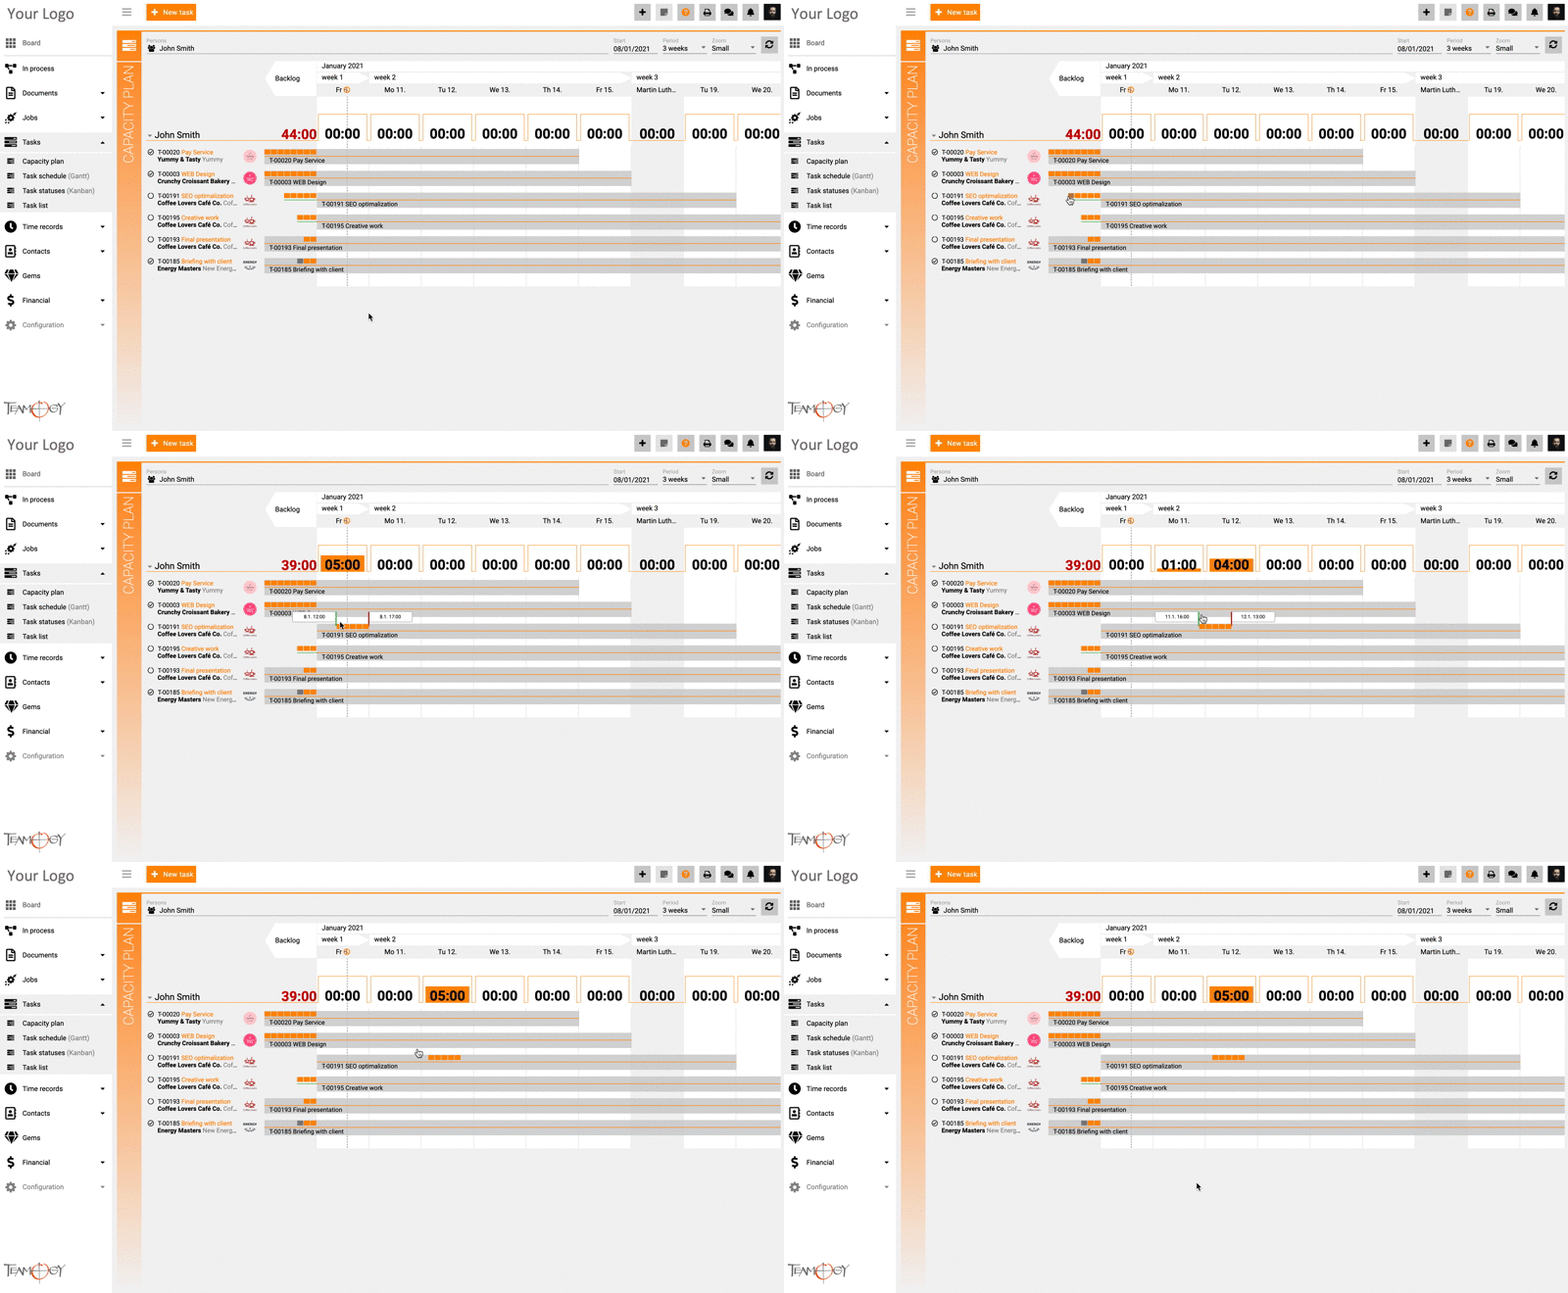
On the screen below you can see the default situation after a task creation. Let’s call these pieces of a chart, which are orange now, as a bead. Each Bead represents 1 hour of a task. Thus, if you create a task for 5 hours, you will have 5 Beads in the Capacity Plan. After a task creation, the Beads are on the left side of the Capacity Plan, as you see it on the screen below. (1) Grey space from Monday to Friday represents time period of the task. (2) Beads will turn grey if you record time to the task.
The Task is planned for five days (from Monday to Friday). With Teamogy’s features, you can plan the time of your subordinates and allocate the time efficiently.
Below you can see how the capacity can be easily planned. Drag & Drop Beads in days. In the GIF below there are two steps in time allocation. First, we’ve allocated all the time of our new task on Monday but as we can see – my subordinate can not handle it. That is the reason why we decided to reallocate the time of tasks for Wednesday. Teamogy helps to allocate the time of your team efficiently!
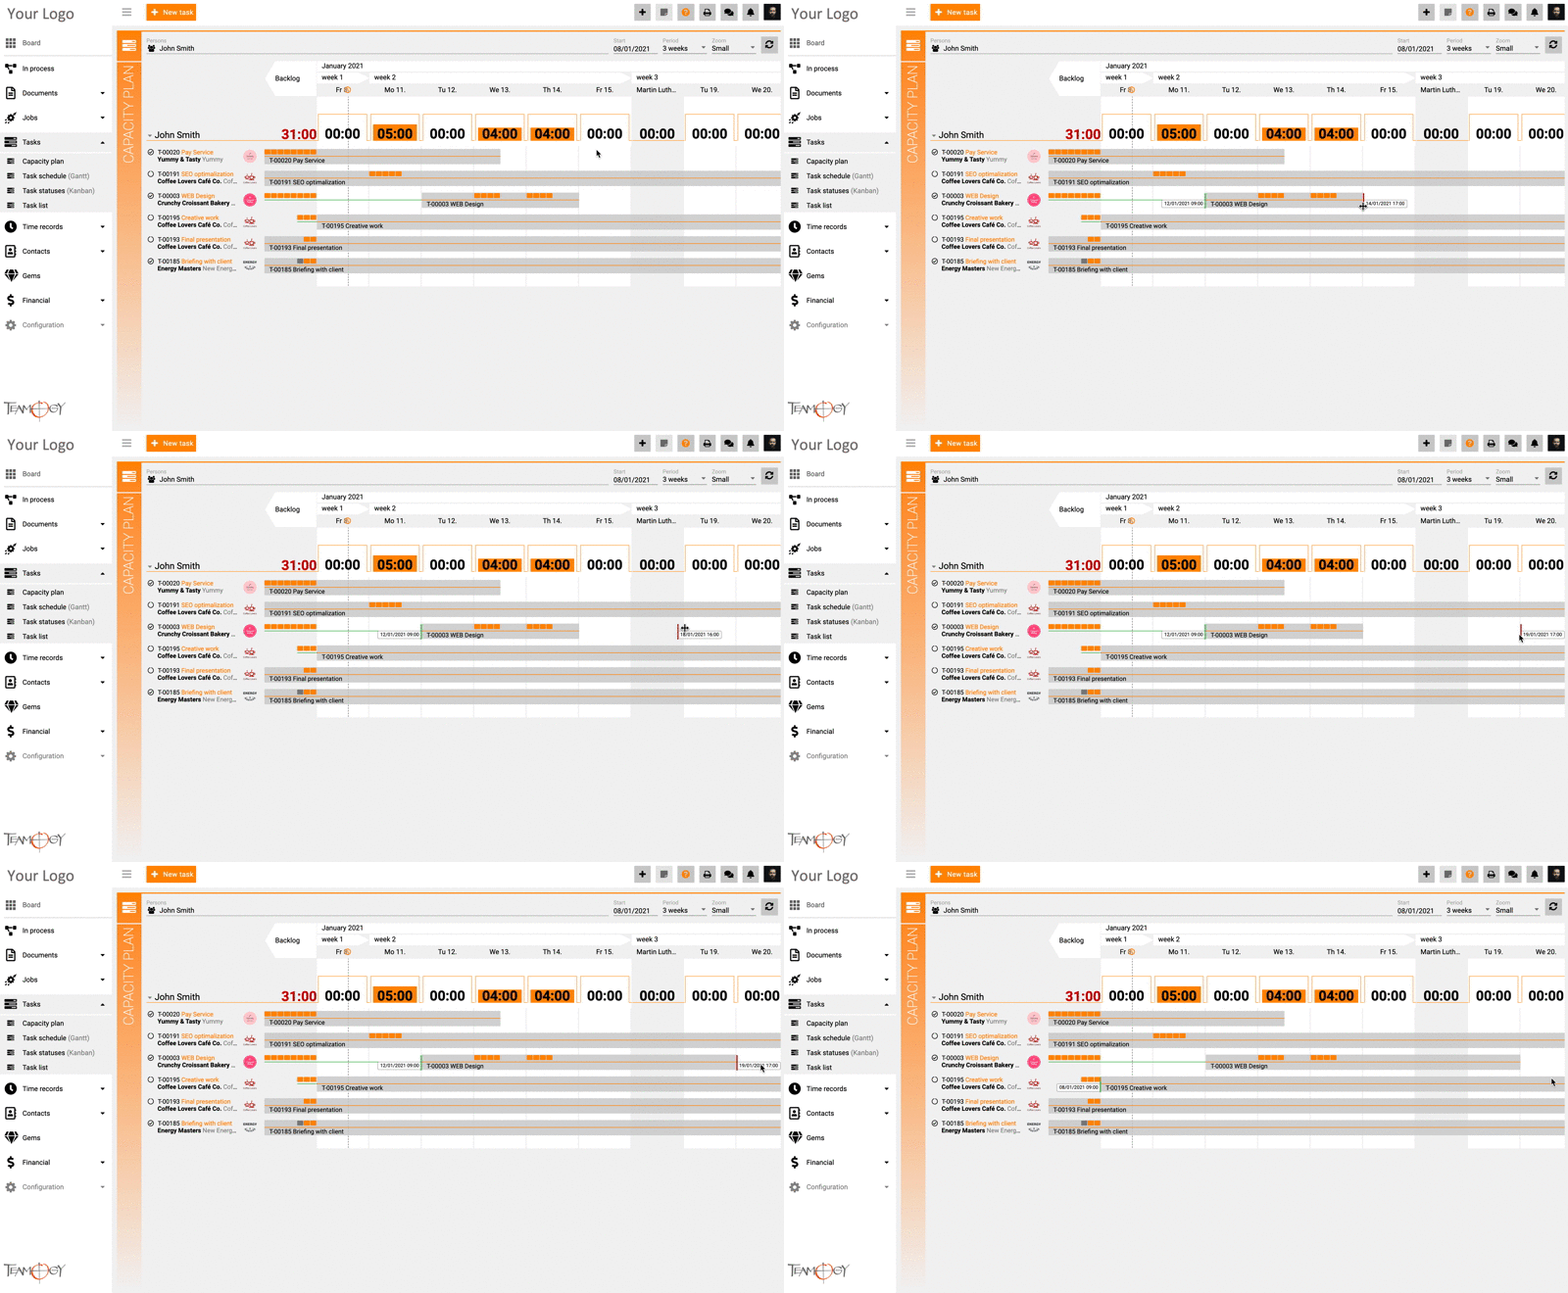
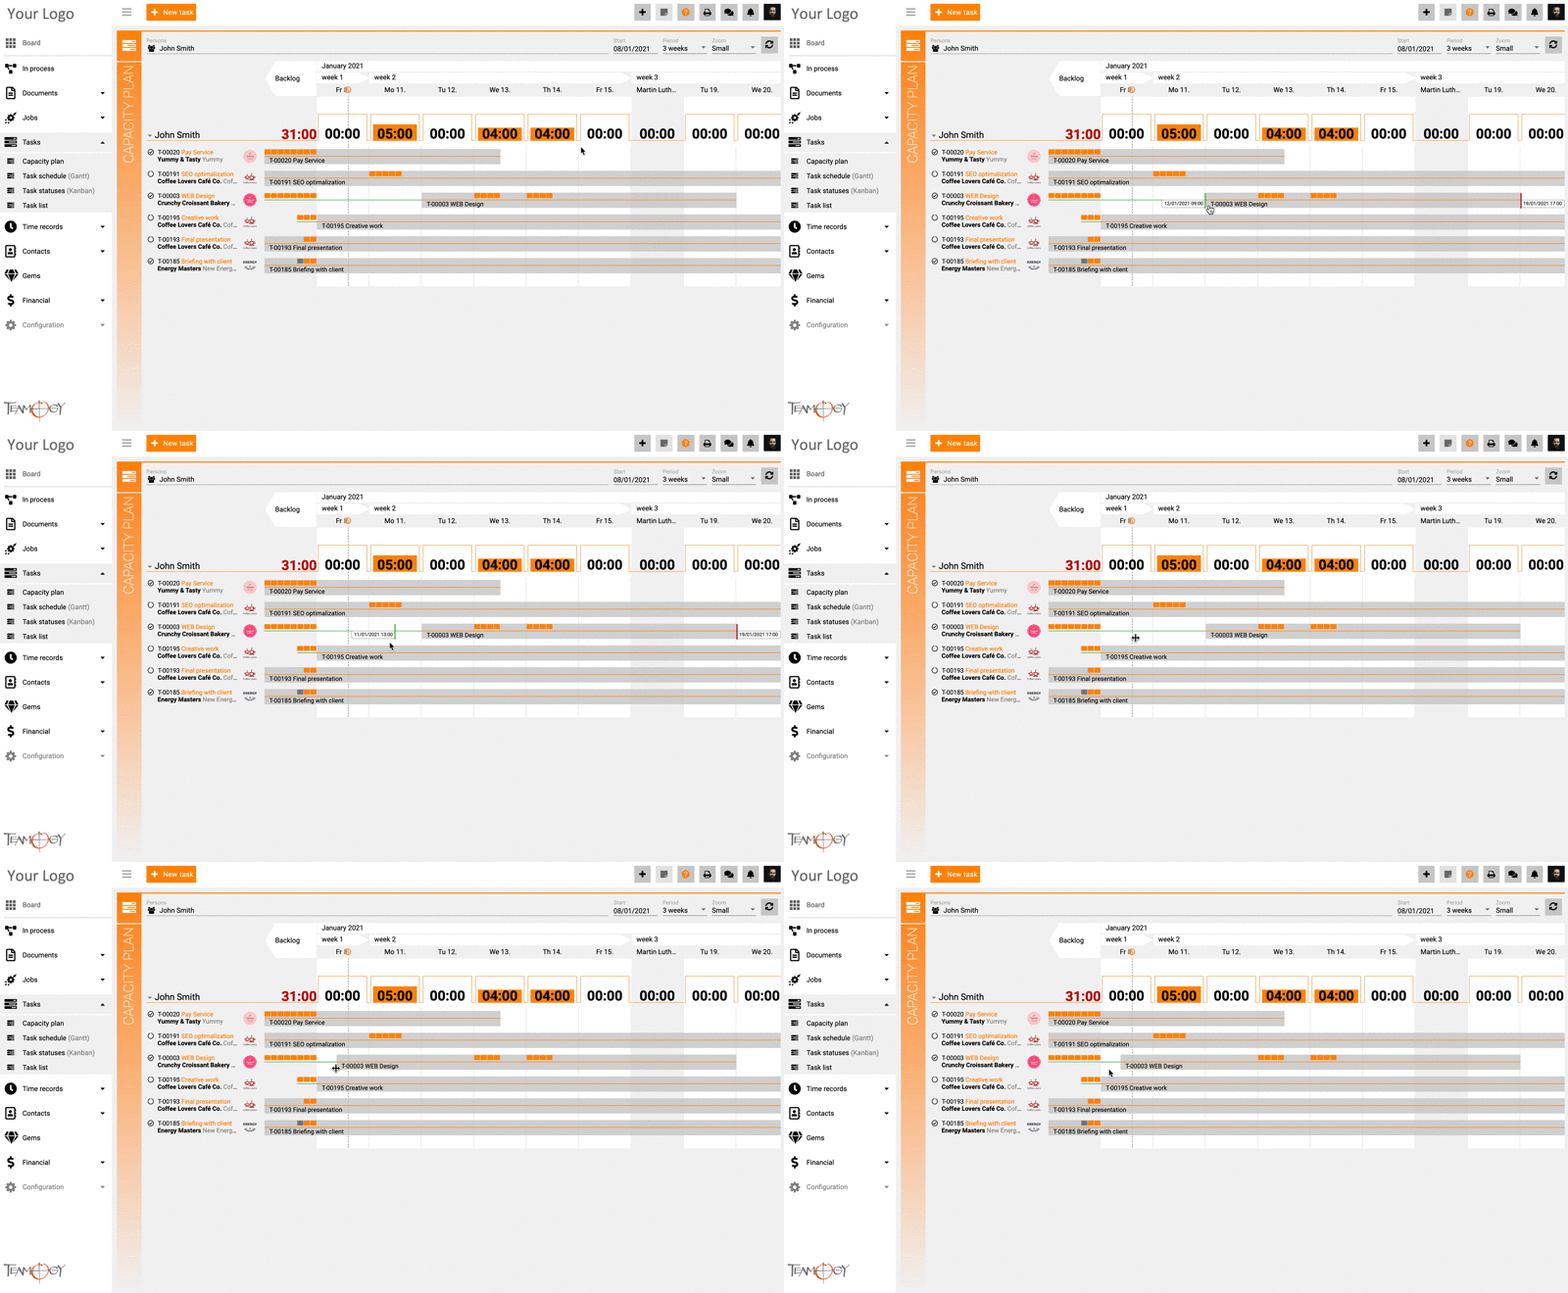
Change start and deadline of the task.
Go to the edge of the task from the right side (red marked) and move it more to the right. You changed the deadline of the task.
Go to the edge of the task from the left side and move it. You changed the start of the task.
How to track multiple users in the Capacity Plan
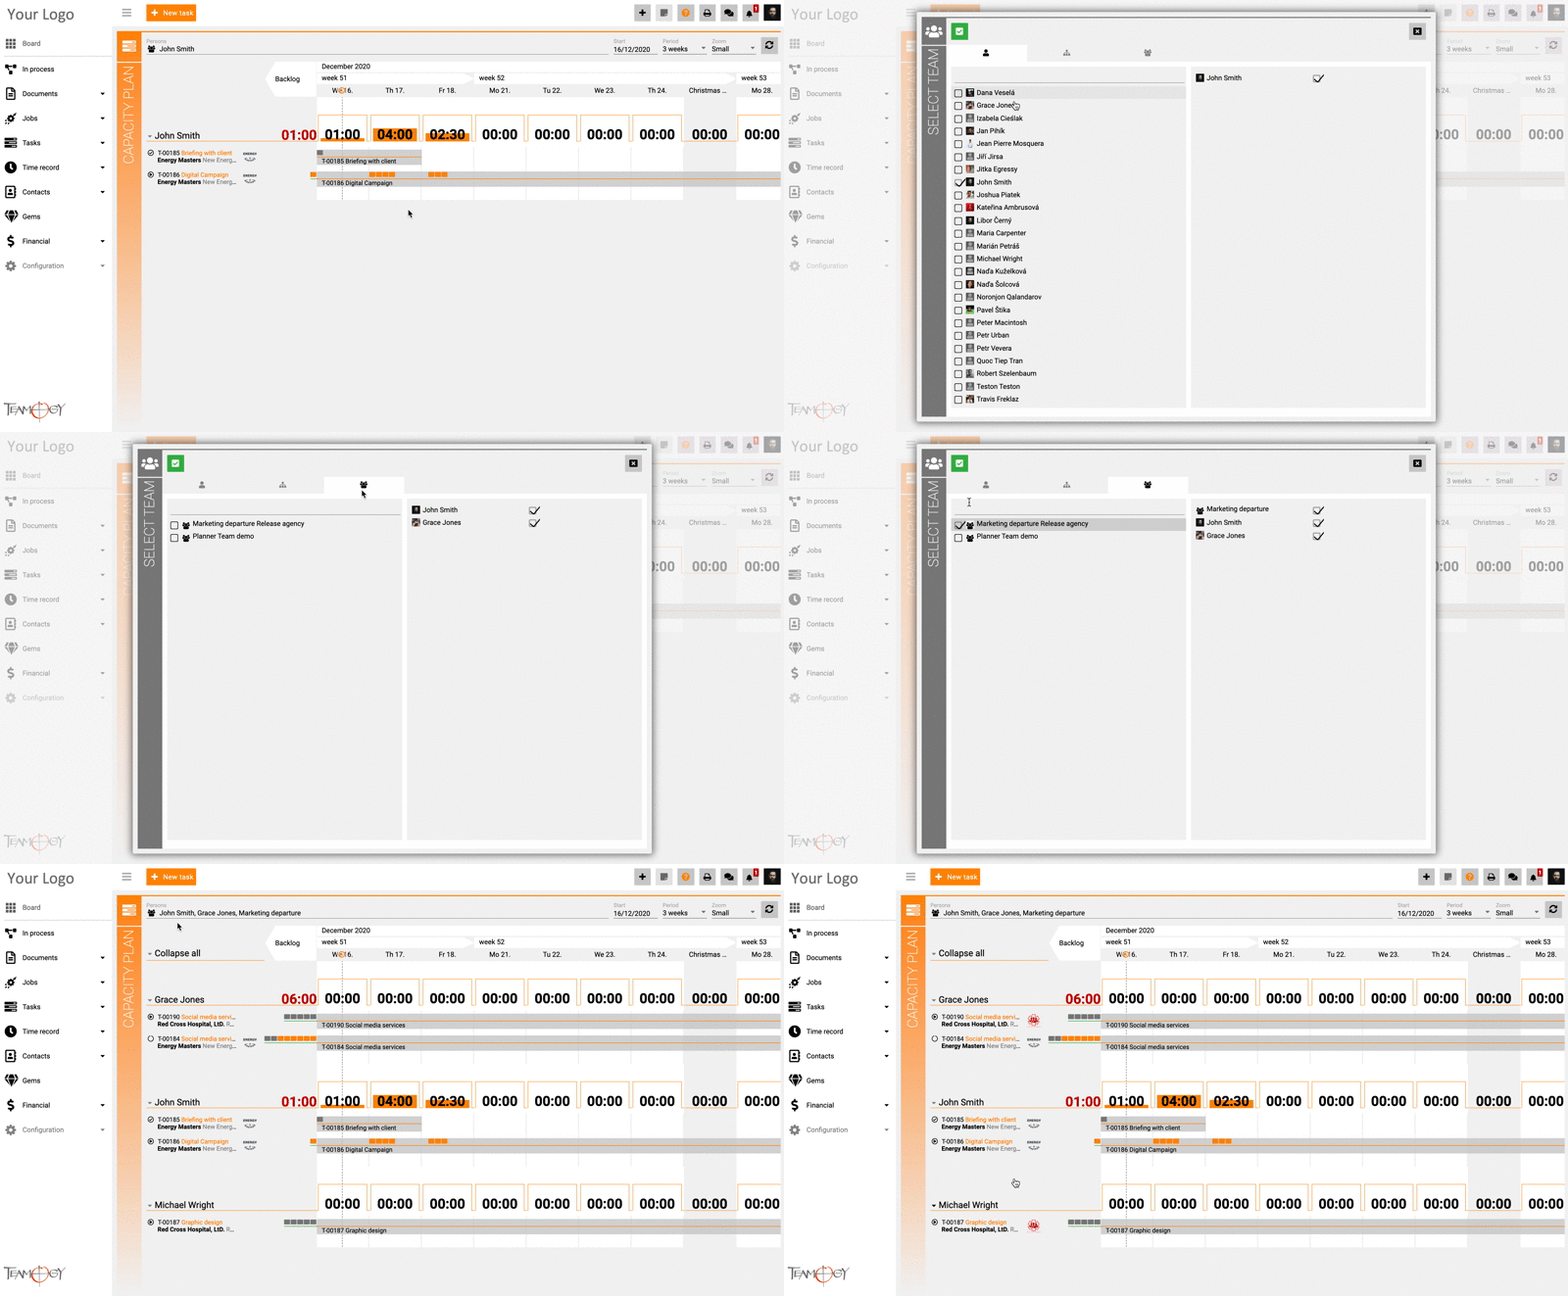
You have option to schedule and allocate the capacity time of yours and your colleagues.
First, in the header of Capacity Plan, click on the name of the person. It will show you the list of your colleagues.
Choose the colleagues that you want to schedule and allocate their capacity time. You have also an option to choose a Team. This is a good option, if you have more colleagues, you will not have to mark all 20 colleagues. You will create a Team with your chosen 20 colleagues.
How to create a Team
Let’s take a look on how to create a Team in Teamogy.
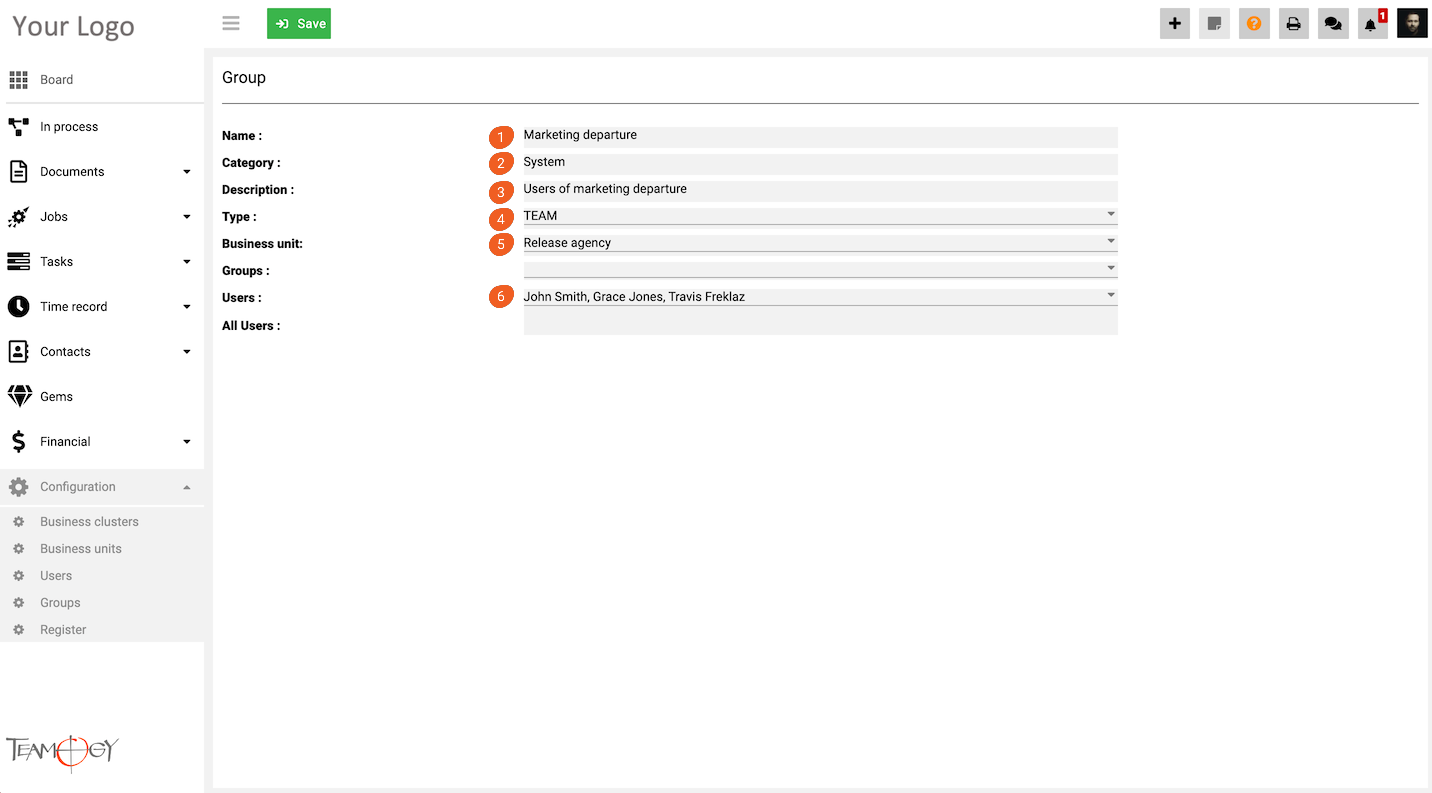
First, go to the Configuration – Groups and click on New Group. You will see a table that will need to be fill in.
1. Choose the name of the Team.
2. Fill in this line with – “System“
3. Description of the Team.
4. Choose option – TEAM.
5. Choose your business unit.
6. Choose Users or Groups who will be part of the Team.
After you fill in all the fields, press Save button and Team has been created! Now you can choose the Team in Capacity Plan.
Get in Touch
If you have problem or need further assistance, do not hesitate contact Teamogy Support. Use online chat (inside Teamogy or everywhere on www.Teamogy.com in the lower right corner) and you will get prompt reply.

