Add New Brand To A Client
You can create as many brands as you want for your clients. The Brand may include the brand logo and the client’s responsible person for the brand. All of these brand details help you to gain faster orientation among many additional running jobs in the system.
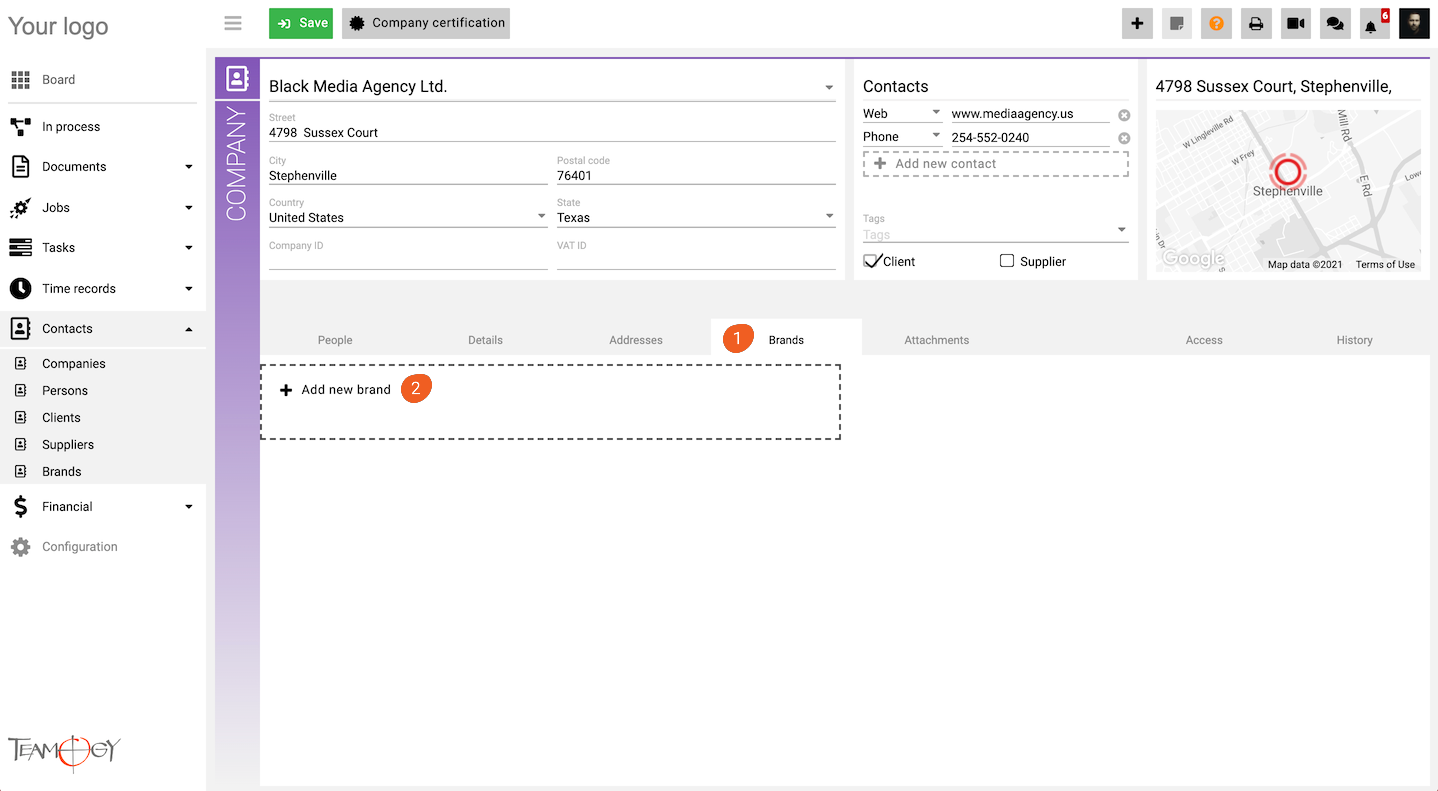
1. Click on the tab Brands. Brands are usually connected with specific clients.
2. Click on Add New Brand.
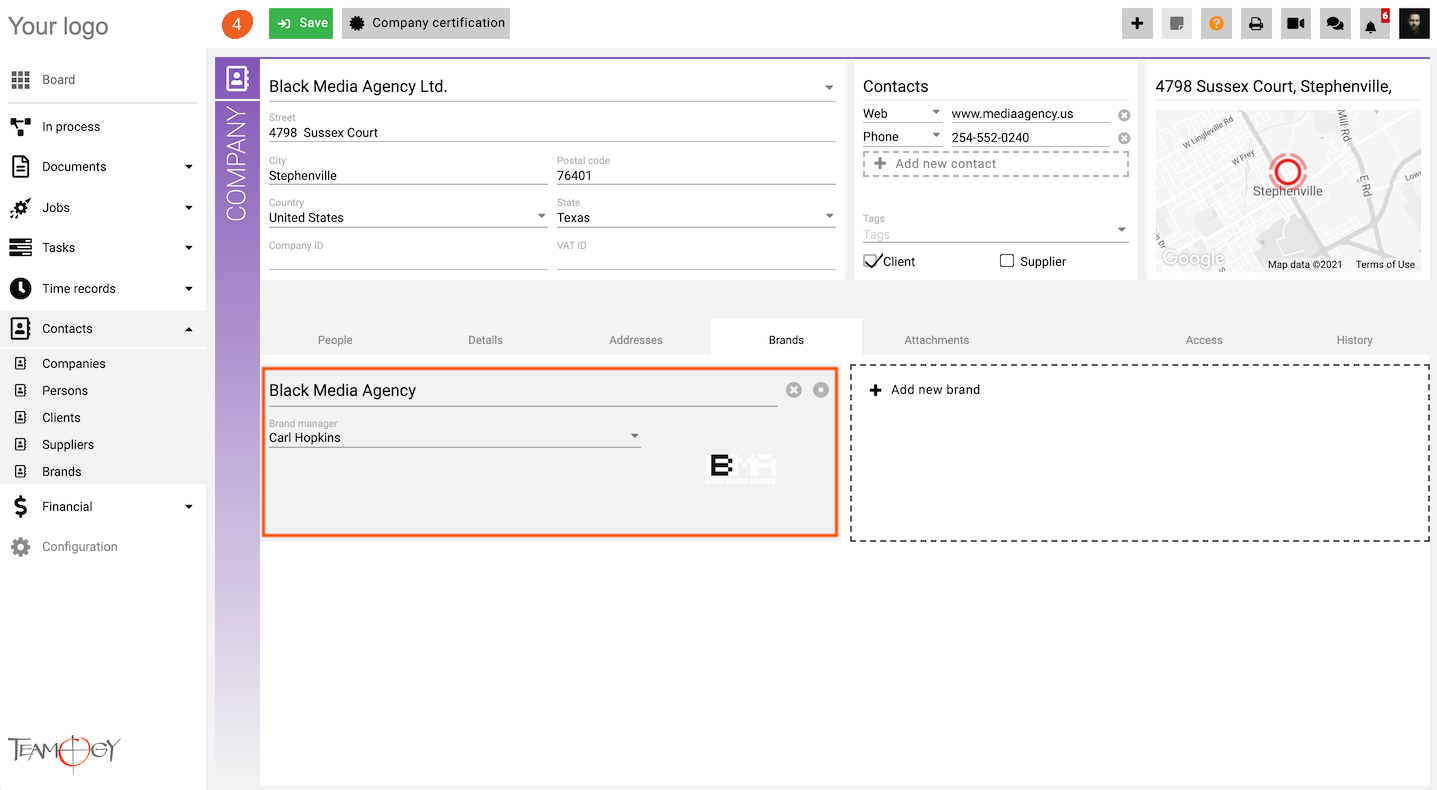
3. Name the new brand and choose its brand manager. Mandatory fields are red underlined (can be different by company’s settings). Also Add Brand logo.
4. Press SAVE button.
5. Perfect! New Brand is added.
You have also an option to choose the default brand of the company that will be automatically filled in the new jobs. Just click on the icon on the right, once the icon is activated, brand is set up as default.
You can also mark the brand as invalid. This function will disable the brand. Click on the icon on the left.
You can see all disabled brands, if you have access to see invalid information. To have access, go to the tab Access, in the Details form select Show invalid information. After the marking, go to the tab Brands and you will see all invalid brands.
Tips & Tricks
You can connect Jobs with Brands, then in the Job View you will see the chosen brand.
Get in Touch
If you have problem or need further assistance, do not hesitate contact Teamogy Support. Use online chat (inside Teamogy or everywhere on www.Teamogy.com in the lower right corner) and you will get prompt reply.


